
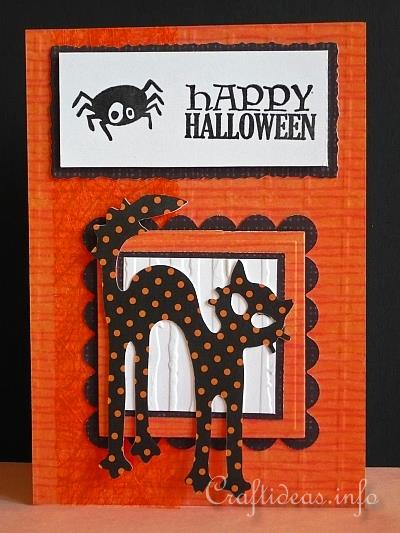
Halloween Card to Craft - Happy Halloween Card With Spotted Black Cat This spooky black cat looks unique with its orange spots. You can of course substitute any Halloween paper you like if you would prefer a different look.
In just a few minutes this card using scrapbook paper, die cuts and clear stamps will be completed and ready to give. Supplies Needed: - white card - orange patterned scrapbook paper and black scrapbook paper covered with orange spots - white cardstock - Sizzix Big Shot - Sizzix dies “Squares, scallop #2” and “Cat and Moon” - Sizzix embossing folders of choice (to emboss the orange card background and the white square background behind the cat) - Fiskars clear stamp set “Halloween Night” (see picture below) - black pigment stamping ink - clear embossing powder - orange fiber ribbon - quilter’s ruler or standard ruler - craft cutting knife - decorative edged scissors - 3-D foam tape - stick glue This is the stamping set from Fiskars that was used for the card. Instructions: 1. Cut and emboss a sheet of orange patterned scrapbookpaper to cover the front of the card. 2. Cut a piece of fiber ribbon to fit the card lengthwise and glue it using stick glue to the left side of the card. 3. Die cut the larger black patterned paper scallop out using the Sizzix die and set it aside for the moment. 4. Cut 2 orange patterned paper squares measuring 6 and 6.5 cm and glue the smaller square centered onto the larger square. 5. Cut a black square measuring 5.2 cm and glue it centered onto the smaller orange square. 6. Cut and emboss a white square measuring 4.8 cm and glue it onto the black square. 7. Now take the square “sandwich” and adhere it onto the black scallop using 3-D foam tape. 8. Die cut a cat from the spotted paper and adhere it onto the squares. 9. Stamp and emboss the Halloween message and a spider onto a 3.5 x 8.3 cm rectangle. Adhere the rectangle onto a piece of black patterned scrapbook paper and cut it out with a 4 mm border using the decorative edged scissors. Now adhere the rectangle to the top of the card. 10. Glue the scallop onto the card below the rectangle.


